
démodéadjective: old fashioned, out of style, unfashionable [from French, the past participle of démoder "to go out of fashion," from mode "fashion"].gallery: 18th century costumes1760s mourning robe à la française |
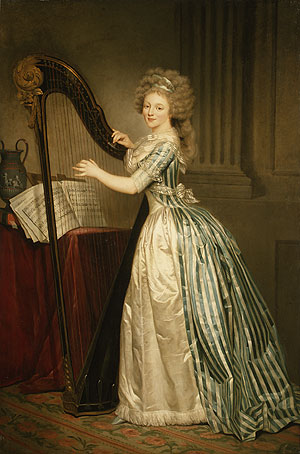
18th century stays (V2: 2007; V1: 2001-02?)VERSION 1: Made (the first draft, anyway) at Costume College. It's made of two layers of corset coutil, with a plain muslin lining and white satin for the outer layer. My two irritations with it are: I'm not too hot on the silver/grey ribbon that I chose to edge the stays with, but there's no way I'm doing THAT over! whew, was that a pain -- all of it had to be hand sewn! Also, the pencil lines that I drew for the boning channels shows through the white satin. UPDATE: I had originally thought that the boning would dig into my overly abundant hips no matter how far up I cut between the hip tabs -- but I have to report that this is one of the most comfortable corsets I've ever worn. Lots of support, no rib pressure, what's not to love?
VERSION 2: So while I love the fit of these stays, the fabric choice never yanked my chain. It was nice and boring, which is fine if no one is going to see them, but when an event came up where I'd be wearing my undies, I decided to do something more fun! I was inspired by the many extant stays with contrast cording in the seams (what I'd call piping, although I doubt it was called that in the 18th century). I used some peach/gold silk taffeta left over from my latest francaise, and picked up some green shantung for the binding and cording. I also wanted the look of more pieces than I actually used, so I recut the pattern into more pieces just for the cover. Since I loved the fit of these, and I really didn't want to go through all the work of making stays, I ripped apart my old pair and recovered the coutil/boning. It wasn't too bad, although I did have to redo all the hand sewn eyelets!
18th century pocketMade years ago, when I randomly was inspired to do some embroidery.
18th century skirt supports (2009)When I made my first late-18th century gown, I decided to make a bumpad: a bustle pad with knee-length prefab quilting to soften the line over the hips. You can read about why, and what I did, in my 1780s robe à l'anglaise project diary. As I've gotten more interested in, and knowledgeable about, the 18th century, I've become dissatisfied with that solution. It creates a nice line for the very late 1780s/early 1790s, when skirts were relatively narrow, but doesn't give the big foofy effect seen in 1770s and early/mid 1780s skirts. So I decided to make some proper 18th century skirt supports, with the bonus that these will work well as skirt supports for the other big-skirted eras (1660s, 1830s-40s) that I wear. The bumroll is patterned from the shape recommended for this era by Jean Hunniset in Period Costume for Stage & Screen. Now, whether it's an accurate shape or not, I don't know. There is very little documentation on what these pads or rolls looked like, although costume historians tend to agree that they did wear them. The cartoon "The Bum Shop" shows VERY oversized bumrolls and pads, but since it's a cartoon, I assume that the sizes are heightened for comic effect. There are mentions of these being made of cork, but I decided to be practical and make mine of cotton stuffed with fiberfill. Now, as to what kind, and how many, petticoats were worn in this era to create this floofy shape, I don't know. I do know that if they were to be just plain petticoats (without starching, cording, or quilting), there would have to be a lot of them. Since quilted petticoats date to this era, and do a fabulous job of keeping the skirt huge, I decided that that would be my solution. While I hugely admire all of you who have made hand-quilted petticoats, I just don't have that level of commitment in me right now (or ever?); I did look into buying some matelasse, but decided against spending the money required. Instead, I went with ye olde prefab quilting (cotton broadcloth stuffed with polyester fiberfill) from oh-so-accurate Joann's. I had originally intended to get ivory, but when that was unavailable I decided what the hell and went with red! I shaped the skirt panels as in the 1770s quilted petticoat in Janet Arnold's Patterns of Fashions. I chose this particular source because it includes an unquilted section at the very top of each panel, which is then pleated into the waistband; I really didn't want to deal with the amount of fabric at the waist that I would have if I didn't! It all made up relatively quickly, and from trying it on my mannequin it's doing a great job of kicking my skirts out in the correct shape. My only concern is whether the poly will be hot to wear... but I'll find out!
18th century tart costume (2008)When Bella Donna performed at the Northern California Pirate Festival, we were excited to get a chance go 18th century and to have a bit more fun than we usually do. Courtesans in the 16th century are serious business; in the 18th century, "courtesan" has a slightly different meaning (note the addition of quotation marks!) -- so we decided to go as tarts. We hit on the idea to use light colors in order to distinguish ourselves from all the red and black worn by most performers/attendees. I wore my standard 18th century shift (to which I added a bit of lace at the sleeves), my peach stays, and made a fabulous stripey (in various shades of peach, red, and green) petticoat to fit over my side hoops. The best part was because I knew I'd be out in the grass/dirt, and only wearing this as a petticoat, I was free to use synthetic fabric (which I hardly ever do these days!) - which made the petticoat very cheap! It's loud enough that it didn't need trim, either, so it was quick to sew. With it I wore a HA-UGE 18th century wig, which I made following this tutorial. Sadly, I am not a professional wigmaker, so it didn't turn out as neatly as I would like, but it got the point across. I'm not sure if it will last for more than one wearing -- I would like to try to redo it, but I'm not sure how to do it any more neatly. But I finally fulfilled my desire for Big 18th Century Hair, and that was exciting! The hat is one of Jen's mini-tricorns, although all credit for the late night, 15 minute crappy covering job with a bit of fabric and some Fabritac falls on my shoulders. One of these days I'm going to spring for one of her fabulous custom hats! In the meantime, I'd like to trim this with some ruching or something to mask the messy job I did. Add to it all as much jewelry as I could get on, a bunch of patches (again, credit to Jen for making us skull-and-crossbones patches - whee!), and my red & white striped parasol, and you get 18th century tart-age!
See
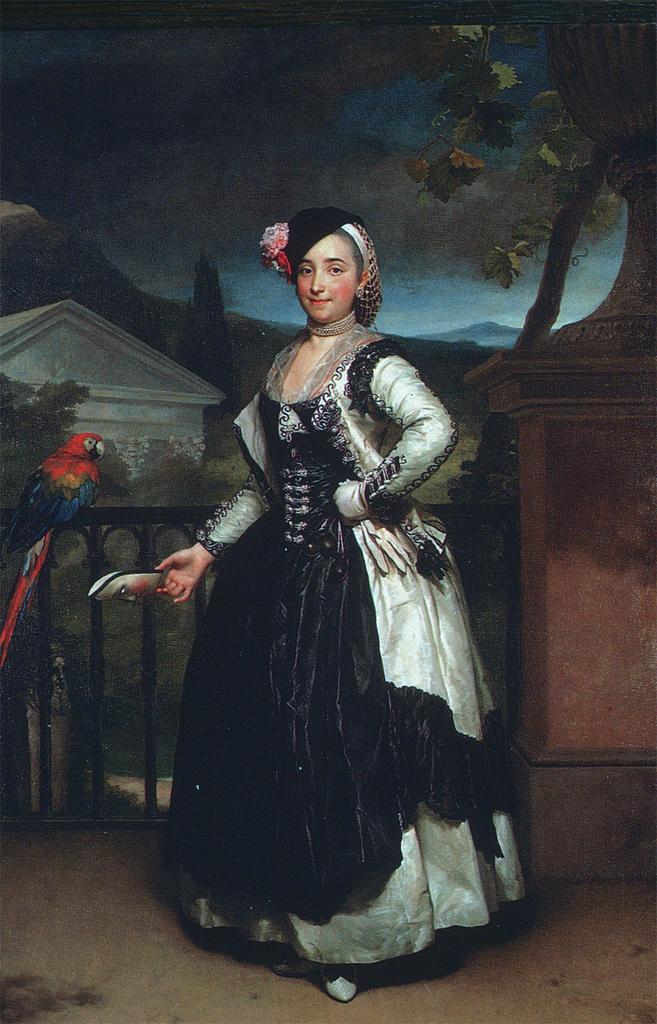
the Pirate Festival gallery on the Bella Donna site for more pictures. 1740s jacket (2006/2008)This started as a 1780s jacket - read commentary and see more photos on the project page. After some horrendous fitting issues and a few years in the closet, I decided to turn it into a 1750s jacket in the style of those at the Museo del Traje in Spain. I cut off the center front portion (I wanted a stomacher in there, but didn't have time, and I have read that they did not always wear a stomacher if their stays were decorative...). I pieced the skirting into the correct shape, made cuffs (those were fun!), and added pocket flaps and fabric-covered decorative buttons. It worked out well enough, although I don't love it.
|
|||||||||||||||||||||||||||||||||||||||||||||||||||||||||||||||||||||||||||||||
)
|
Read commentary and see more photos on the project page.
)
|
)
|
)
|
Read commentary and see more photos on the project page.
) |
) |
) |
Read commentary and see more photos on the project page.
) |
) | ) |
Read commentary and see more photos on the project page.
) | ) | ) |
Read commentary and see more photos on the project page.
) | ) | ) |
![]()
Read commentary and see more photos on the project page.
)
|
)
|
)
|
The robe ŕ la polonaise, which was ŕ l'anglaise, which was a roundgown, which was a caraco... ŕ la parisienne! Read commentary and see more photos on the project page.
) | ) | ) | ) |
) | ) | ||
Finally has been trimmed!. Read commentary and see more photos on the project page.
)
|
)
|
)
|
Of all the characters in Marie Antoinette, I loved the Comtesse de Polignac the best (come on - red hair, champagne, lines include "Fabulous!"). Of all her dresses, I weirdly loved this gaulle (or chemise à la reine) the best. Why best, I have no idea, but I was struck by: it's not white (us redheads don't look good in stark white), it's fitted in back (some fitting somewhere is a really good idea when you're a curvier girl), and it's just too darn cute! So I knew I would have to make it at some point.
After peering at fuzzy screencaps for a long time, I determined: the dress is fitted in back (probably to a lining), gathered in front (no lining - you can see the sheerness); long fitted sleeves of the kind fashionable in the 1780s, with no pleating or gathering at the armscye; some kind of sheer, ruffly trim at the cuff; round waistline; long full skirt; rosy red sash at the waist.
) |
) |
) |
) |
My version is made of a very light peach sheer cotton lawn. The back is patterned off of my 1780s robe à la polonaise, with the shoulder straps cut a bit more curved at the back to mimic the back neckline. The back is lined with white cotton muslin, and interlined with peach silk organza (no, not period, but readers of this site know my love of silk organza as interlining). The back skirt has a round waistline that's seamed (ie not cut in one with the bodice - no way to get that fitted bodice back with such a full skirt) and gathered.
The front of the dress is patterned off of the gown in The Cut of Women's Clothes, with a slight scooped neckline. I turned over the edge of the neckline to make a casing there, and used a long strip of the lawn fabric to make a waistline casing. Although I couldn't get the sides (under the arm) quite as flat as the film gown, I found that once I attached the gathering ribbon at the waistline and put tension on it (ie to gather up the waistline and tie it off), it helped a lot to keep the fitted back attached and to smooth out the area under the arm. The front is unlined.
The sleeves are patterned off of the long, fitted, shaped sleeve in Period Costume for Stage & Screen. I was surprised to find that I was able to get that similar no pleating/gathering at the armscye - I think the sheer fabric, and lack of lining, helped - in that the fabric was able to stretch. I had to mess a bit with the pattern, particularly pulling up the undersleeve piece a bit, as I was getting some weird wrinkling on the underside. Late 18th century long sleeves are cut with a very decided angle to them at the elbow, and I found I just naturally held my arm in that position throughout the day. The cuff is trimmed with two layers of sheer, ivory silk organza, box pleated separately (ie so they don't stick together).
Except for the skirt side seams, the long vertical seam where I pieced together the front panels, and the armscye, the entire dress is handsewn. I just so prefer the look of handsewn seams on 18th century projects, and once I started it seemed silly to stop (for example, I kept thinking, "Oh, just machine the waist casing! It's under the sash! No one will see it!" - but when it came down to it, I couldn't stomach the thought!).
I wore the dress with a long sash made of red and white striped silk shantung (left over from my stripey bustle gown) -- which although I cut to be very wide (3.5"), kept folding on itself down to about 2.5"; I think I need to interline it with something, or just cut it a bit shorter -- a beautiful faux 18th c. portrait pin given to me as a birthday present by Shawna, and of course the whole ensemble is worn over my shift, 18th century stays, bumroll, and petticoat.
) |
) |
) |
) |
) |
) |
In anticipation of my trip to Colonial Williamsburg (okay, and Costume Con, but I'm far more excited about the first), I'm trying to pull out all the stops (plus if I'm going to be walking around all day, I want to keep out of the sun). And that means a new hat! I'm making two 1770s dresses (this à la turque and this à la polonaise), which means I really need a 1770s hat, preferably one that will fit over my pouf. So I tried - I really did! - to make a 1770s hat... but the hat kept tugging towards a 1780s bergère instead. And who am I to ignore a hat when it speaks to me? In particular, this yellow hat from Marie Antoinette has always caught my eye, and no matter which other images I looked at for inspiration, I kept ending up back there. I had planned to bring my 1780s hedgehog wig as a way to mix up my hair options, so obviously during the day (when I need a hat for practical reasons), I'll be hedgehogging it; I figure I can change to a pouf at night, when I want to dress up more.
To make the hat, I pulled apart this hat, which was a last minute Macy's purchase when I needed a hat to go with my 1909 dress; for that wearing, I just took off the straw bow and retrimmed it with some ribbon and flowers. However, I never liked it as the brim shape is so very modern, so it's just lurked unworn in my closet for years.
) |
) |
I had already taken the crown off to resize the hat back way back then, so I just pulled the trim off and again took the two apart. Next, I took off the bias on the brim and the wired edge (which actually turned out to be a ring of plastic, I was amused to find). Then I wet the brim just for a minute or so in some hot water, spread it out on the table using some very flat-bottomed dishes that I moved around periodically to flatten the brim. I wanted to curl up one side, so I used some masking tape and a wooden rolling pin.
) |
After the brim dried, I edged it with millinery wire. I wanted a much shorter crown, of course, so I cut that down to about 2". Then came the frustration of "How the hell am I going to trim this sucker?" See, because I wanted to wear it with those two dresses (basically green and peach), it needed to coordinate but not be matchy-matchy (which I hate). I hemmed and hawed about colors, originally buying some vintage blue and gold ribbons. But when I actually held those up to the dresses, they didn't work. The yellow in the MA dress/hat kept tugging me, but I didn't have anything like that on hand. So I found some white taffeta and started with that, figuring I would worry about the other colors when I got there.
I decided to cover the crown and line the brim:
) |
) |
) |
) |
||
Then it was back to the fabric/ribbon stash, and NOTHING worked. Except for either green or peach, and see above re: matchy-matchy. Finally, I caved and used the tiny bit of fabric I had leftover from my 1780s anglaise; I wish I could have come up with something more inspired, but time is of the essence. I cut some on the bias to edge the brim:
) |
) |
Then I cut some more fabric to make "ribbons," centering the various stripes so as to have some variation. I always have a hard time figuring out what to do with ribbon on a hat other than box pleat it. So I thought about those 18th century dresses where the trim is padded out with cotton wadding, and came up with this effect, layered on top of a ruffle made of the white taffeta. I used some narrower ribbon to add a detail to the turned up brim and make a bow, and I found some yellowish-green ostrich feathers at Lacis (the ONLY color they had, except white, which went with the hat colors). I may also add the glinty pin, which I found in my last foray to the LA garment district. The feathers/bow/pin aren't attached yet; I'm thinking I want to make those into their own hoo-ha so I can remove them and wear them without the hat.
) |
) |
) |
) |
||
)
)
)
)
)
)
)
)
)
)
)
)
)
)
)
)
)
)
)