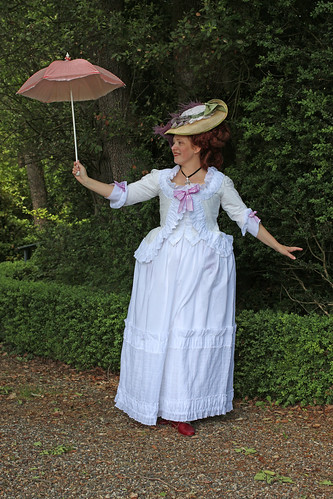
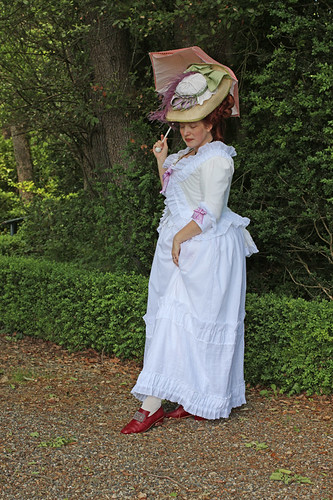
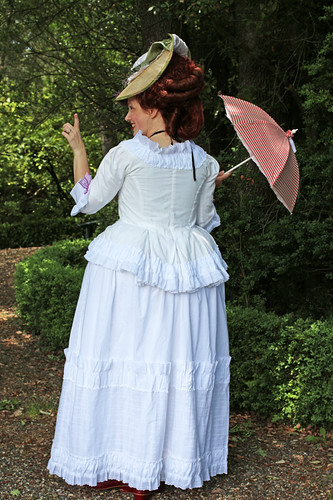
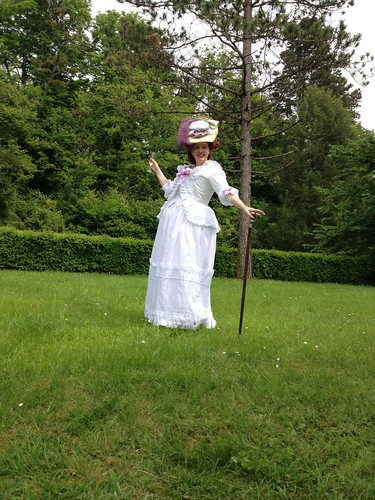
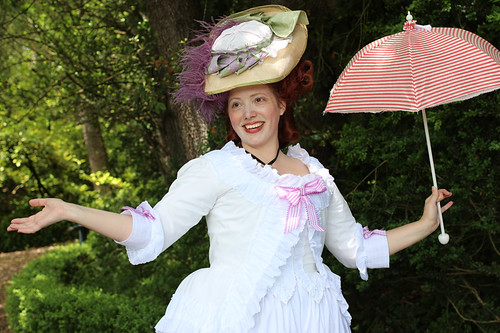
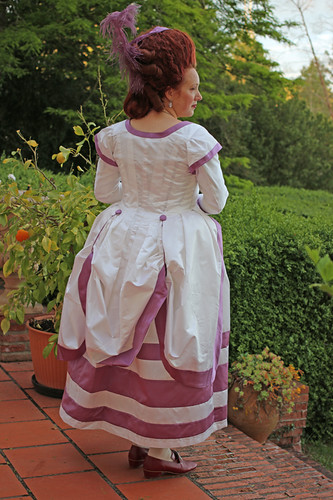
Last project to blog about from France! For some reason this was the project I was most excited about making, and ended up loving the most while wearing — I think I just had a fixation on being WHITE and FROOFY and RUFFLY. In all caps, natch.
I posted a bit about the early steps on the project here. After that, it was all a matter of borrowing Trystan’s embroidery machine to sew the scalloped edges on the miles of windowpane ruffles. I had a small crisis when I thought I’d run out of the windowpane before trimming the skirt, but managed to find a bit more of the fabric — I had to wing it on my machine for doing the scalloped edges, as I don’t have a fancy machine like Trystan, but it all worked out. Minus the scallops, all of the rest is handsewn.
I added some striped lavender and white bows, from ribbon that’d been lurking in the stash for years, to the CF neckline and sleeves to bring some color to the ensemble. And I wore it with the hat I originally made for Vaux le Vicomte, although I changed up the trimmings a bit to suit the lavender color scheme.
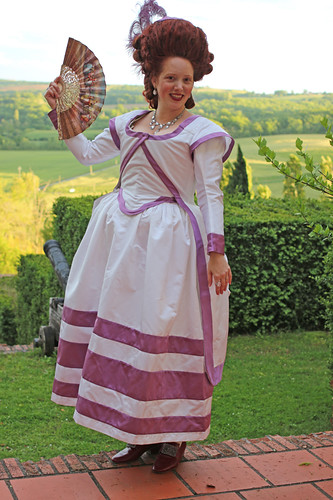
The one thing that’s bugging me is that, since I was worried about wearing stark white with my warm coloring, I used a slightly off-white lining for the jacket — and in these photos in the shade, it really changes the base color of the jacket. I’m not positive it looks that off-white in regular lighting, but it’s annoying, as it’s made of the exact same fabric as the skirt!
I still have at least two more posts to write about France, so I really should get busy! And speaking of wigs, I wanted to post about the wig I made for France.
Luckily, somehow, all of the projects to which I was drawn were right around 1780, so that made it easy — one wig to rule them all! I did contemplate making a grey wig for a more historically accurate look, but realized that a big trip like this wasn’t the time to take a risk — if I was going to have only one wig, I wanted to know the color would work on me.
Here’s my inspiration board, which I had up while I was making the wig:
My first try needed rework, which seems to always happen (yes, that advice is going in the book!), as it was TWICE as high as the final version. I almost went with it, then reminded myself that that wasn’t the era I was going for. Here’s how the wig turned out:
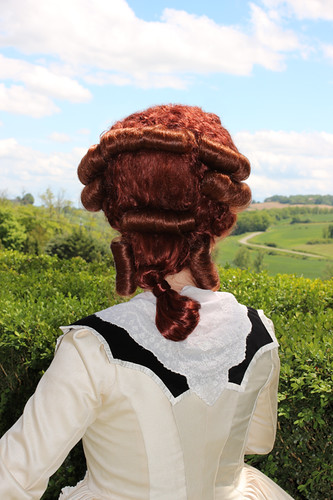
I have a vintage 1960s hatbox that I use for my wigs when I travel. The wig block never fits, so I stuff the head portion of the wig with plastic bags or newspaper or whatever is on hand, and if the wig isn’t as tall as the box, I do the same with any empty space. This wig was wide enough that I had to take off the rolls to pack it, but part of my plan was that I could move the rolls around for different looks, so that was fine. The other thing I planned was different ways to style the chignon (the back hair) and various hair accessories, to mix things up… didn’t want to get bored of wearing the same wig over and over!
Here’s the many ways I wore it:
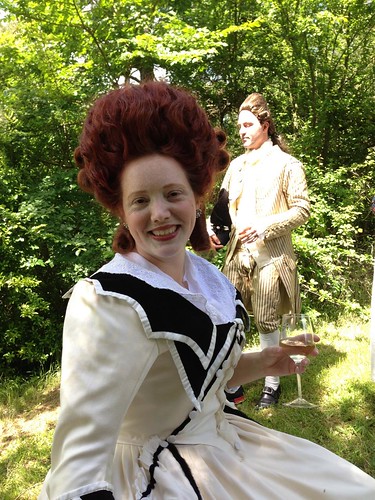
First day with redingote, no hair accessories finished so nada, cadogan in back:
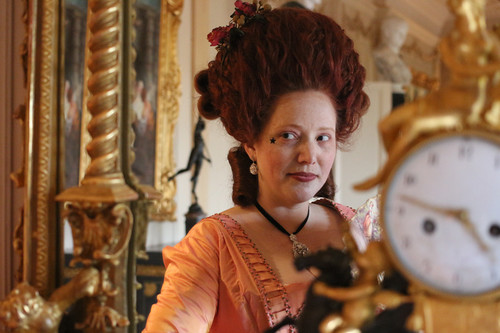
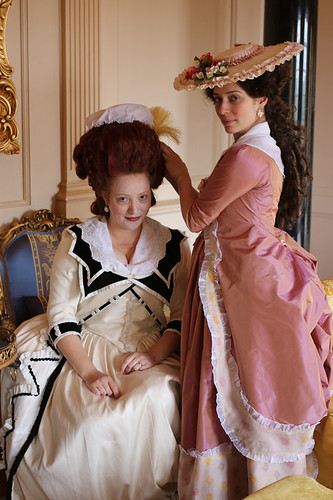
Evening look, with fake flowers pilfered from my room at the château (and returned), chignon looped up:
With purple ribbon and feather:
With ridiculous hat — I love the “floating hat” you get in this era!
With an organdy pouf, feather spray, and brooch for redingote rewears:
The rolls were looking a little shabby by the end of the trip (note to self, fix those up before CoCo!) but otherwise the thing made it through the whole trip!
It’s really really happening — the 18th Century Hair & Wig Styling: History & Step-by-Step Techniques book project is really starting to take shape! About half of the text is written, all of the historical images have been sourced, and I’m starting to line up models and buy supplies.
Here’s the blurb I’ve written up that summarizes the project:
18th Century Hair & Wig Styling: History & Step-by-Step Techniques is a book that combines meticulous research with easy to follow instructions that will help you create historically accurate hairstyles of the 18th century. The book includes a detailed history of men’s and women’s hair from 1700 to 1799: which styles were worn when, as well as how hair and wigs were styled. It provides practical techniques for styling hair and wigs that will be useful to anyone who wants to learn more about historical hairstyling, from beginners to advanced users. Step-by-step instructions show how to create 25 individual hairstyles — 22 for women, and 3 for men — that span the century, and suggestions are included for ways to vary the different styles.
The historical overview provides equal, in-depth coverage of men’s and women’s hairstyles and wigs from 1700 to 1799, focusing on France, Great Britain, and the American colonies/United States. The techniques will similarly be useful for both men’s and women’s styles. While a good deal of historical styling information is included, the emphasis is on modern methods and products that will achieve a historically accurate look.
This book is perfect for historical costumers and theater/film designers and craftspeople who want to create authentic-looking 18th century hairstyles and wigs. It will also provide a solid foundation and fun jumping-off point for anyone who wants to create historically-influenced fantasy styles!
I’ll be posting lots of info here, but the best way to keep up to date on the project is to follow the Facebook page and website:
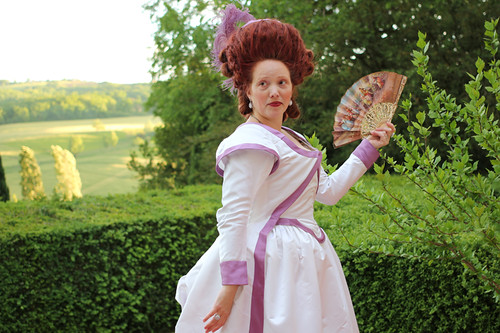
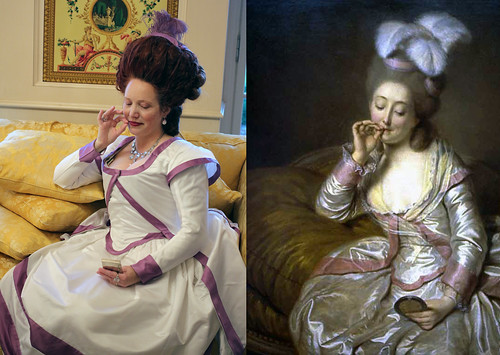
Another new costume that I made for the trip to France was a robe a la circassienne. I was initially thinking that the inspiration image was a robe a la turque — essentially, a later version of the robe a la polonaise, but with long undersleeves and short oversleeves — until I peered a bit more closely at the painting and noticed some of the purple banding on the skirt at the side back. I can’t imagine how that would get there without it being the hem pulled up, which would make this a circassienne (the main difference between the two styles is that the circassienne has the skirt looped up):
Young Woman Admiring a Miniature by Wille, 1778. The red arrow is pointing at what I think is the hem banding, looped up.
This made me relatively happy, because although I was really excited about how pretty the initial drape looked with a long train, there is NOTHING practical about a train when you’re using white silk duchesse satin.
As I may have mentioned previously, draping this sucker was an EXPERIENCE. I decided to do the totally-authentic thing and drape it on my dress form using the fashion fabric. A great idea that’s worked out well in the past, but this time, there were MANY revisions as I futzed and futzed. I was worried about having enough of the (expensive) fabric, and so trying to drape it in an economical way — but instead by revising it multiple times, I ended up wasting a lot of fabric (slashing the armhole, for example). At least I was in love with the back pleats, so that kind of made up for things…
I decided to try some new approaches to the underbodice layer, so knowing that they used separate bodices (called “corsage” in French, I haven’t found an English term yet) I decided to go with that. Plus, I was thinking that the overgown could work fabulously over a chemise a la reine (although more so when it had a train, maybe less so now?) — so I decided to attach the undersleeves to the bodice and only the oversleeves to the robe. I have no idea if this is period, as I haven’t yet been able to identify an extant example, but this is experimental archaeology!
I posted a bit about draping the underbodice here, but to my supreme irritation, what was supposed to be a perfectly fitted back-opening bodice cut on the straight ended up with serious wrinkles. I tried facing the front with some heavy linen fustian, but it was still wrinkly, so I ended up adding a piece of boning to the CF… after which it was still wrinkly. I loved wearing the outfit, but I spent the whole time feeling embarrassed about my wrinkles! You’ll see what I’m talking about in the final photos.
In progress - no sleeves. CF looks relatively smooth, but...!In progress. The back is made of one layer of linen and closes with spiral lacing.After attaching the undersleeves
I used bias strips of the purple to create the bands along the various edges (except at the bottom of the underbodice, where I really had to follow the line of the hem). Comparing it all now with the original painting, they’re a little too narrow in places (especially the skirt), but I was in gotta-get-this-done mode, so it is what it is!
Finished robe and underbodice
I handsewed every stitch of the robe and underbodice, and really wanted to do the same for the petticoat, but I’d run out of time… and fabric! One other reason I wanted to make this a circassienne was the much shorter hem, leaving me some more pieces of fabric to try to piece together to make the petticoat. But I was stuck with a whole bunch of strips. Initially I pictured the petticoat being all white with a purple band at the hem, but as I was looking for ways to piece things, I came across this fashion plate and decided it would be a good way to use up all those small pieces of fabric, PLUS it had an added je-ne-sais-quoi:
Circassienne de taffetas à bandes de rubans, Gallerie des Modes, 1779 | http://www.mfa.org/collections/
I had to order a bit more of the white satin as well as the purple to make it work, and I think in the end I spent only a little less than if I’d just bought enough to make the whole thing white — but again, I think it adds some more flair to the outfit!
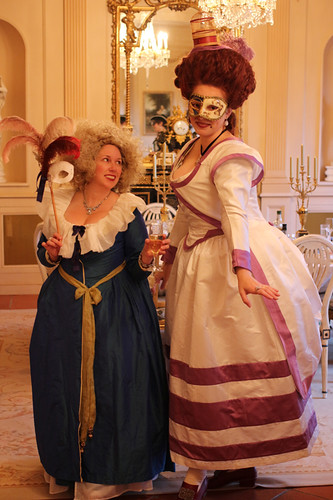
I made fabric-covered buttons with the purple silk, and purple lucet cord out of some silk embroidery floss, to loop up the skirt. At the château, I accessorized it with way more jewelry than the inspiration image, plus a purple ribbon and feather (thanks Fanny for the feather!). And a lot of stomach wrinkles:
And yes, as Sarah kept pointing out, the painting has tons of stomach wrinkles. I DON’T CARE. I couldn’t stand it! After the first wearing, I took off the boning and fustian and took a horizontal tuck across the waistline of the bodice front… which only reduced the wrinkles a little bit. Harumph. So the front of the underbodice WILL get recut, hopefully before Costume College as I’m thinking this will be my gala gown (I have NO desire to take on any big projects anytime soon, after all that sewing for France!).
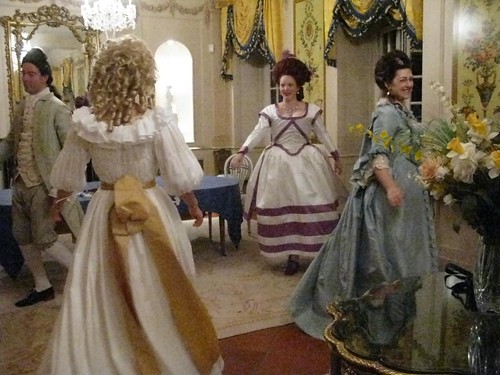
Here it is with the waist tuck, worn with a mask and bird cage for our masquerade evening:
In the end, though, if I forget about the wrinkles, I really love it! Best of all it was perfect for dancing — poor Lisa and Cathy kept getting their trains stepped on, but I was free as a bird.


